RSS
Showing posts with label Urban Decay. Show all posts

Gloomy Storm Eye Of The Day: May 3 (Dupes & How To)

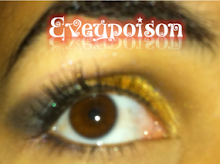
This is an eotd I did using urban decay & NARS eye shadows. This is a really good look especially if you want to make your eyes pop. This is something I think would go great with prom. What I like most about this look is that the pop of color is not overwhelming. 

Products Used:
Eye Shadow Primer: Too Faced Shadow Insurance
Eye Shadow (Shade 1): Urban Decay Money (Book Of Shadows 3)
Eye Shadow (Shade 2): Urban Decay Haight (Book Of Shadows 3, it is a permanent shade in Sephora)
Eye Shadow (Shade 3): NARS Underworld  (Day & Night Palette)
Eyeliner (upper lash line): NYC Liquid Eyeliner in Pearlized Black
Mascara Primer: Hard Candy 1,000 Lashes Fiberized Lash Weave Primer
Mascara: L'oreal Telescopic Explosion, Cover Girl Lash Blast Length


Substitutions:
Most of these shades are limited edition so here are dupes & or substitutions for each of the shades: 
Urban Decay Money: This is a grey with green undertones and it is kinda of metallic looking. I do not have a specific color but I would use a light silver & then over that put a little olive over it. 
Urban Decay Haight: This is a blue green. It is not limited edition. A dupe for it is Maybelline Expert Wear Eye Shadow in 155 Turquoise Jewel.  
NARS Underworld: This is a black with a navy blue undertones. A dupe for it is Sally Girl eyeshadow in White Chocolate. These eyeshadow retails for .99 cents!
I might do a future post showing both of the dupes in comparison to the original shade
Here is how to achieve this look:
First start with a clean eye & prime it (this is so it will last all day or night)
Then apply the first shade to the inner half of your eyelid. 
Apply the second shade on the outer half of your eyelid (leave a little space in the outer corner). Make sure to take it up a bit into the crease. 
Blend the second shade
Put the third shade in the space you left & take it up to your crease
Apply the third shade into the lower lash line 
Apply a thin line of eyeliner (I used liquid)
Apply Mascara
(Finish the rest of your face) & You are done!
*If you want to make this more dramatic you can tightline & add  false eye lashes!*

If you have any questions, leave them down below
*All of these products were paid with my money*
*All images are my own*

  • Digg
  • Del.icio.us
  • StumbleUpon
  • Reddit
  • RSS

Bronze Desert Eye Of The Day December 29


Here is my EOTD. I only used eyeshadows which are in the Urban Decay Naked Palette. 
Products used:
Face:
Primer: MAC Matte Cream
Foundation: Maybelliene Dream Liquid Mousse
Set Powder (For Face): MAC Mineralize Skin Finish Natural,
Set Powder (For Eyes): elf Mineral Eye Brightener in Buff 
Concealer: Make Up For Ever 5 Camouflage Cream Palette in N 1, MAC Studio Finish Concealer
Cream Blush: MAC Cream Colour Base in Movie Star Red (Stylishly Yours Collection)
Contour: NYX Blush in PB 11 Taupe
Highlight (For Nose & Brow Bone): Almay Bright Eyes Liner/ Highlighter duo in 01 Cocoa & Pearl
Highlight (For Cheeks & Cupids Bow): MAC High-Light Powder in Honey Light (Naked Honey Collection)
Blush: Kevyn Aucoin The Pure Powder Glow in Dolline

Eyes:
Primer: Urban Decay Primer Potion (Original)
Base: MAC Paint Pot In Let Me Pop (Cham-Pale Collection)
Eye Shadow: Urban Decay Naked Palette, the shades I used are the following: Smog, Sidecar, Darkhorse, & Half Baked
Eye Liner (For Upper Lash Line): Urban Decay 24/7 Liner in Zero
Eye Liner (For Water Line): Chromagraphic Pencil in NC 15/ NW20 (Pret-a- Papier Collection, Cham- Pale Collection, Permanent at MAC Pro)
Eye Lash Primer: MAC Prep + Prime Lash
Mascara: Sephora Lash Plumper, Rimmel Eye Magnifier

Lips: 
Lip Blam: elf Studio Conditioning Lip Balm SPF 15 in Mellow Melon
Lip Stick: MAC lipstick in Ravishing
Lip gloss: MAC Dazzleglass Creme in Passing Fancy (Tartan Tale Collection)

Here is how to get this look:
I first put primer from the lid to brow bone. Then applied MAC paint pot to the lid. For the first shade I used Urban Decay eye shadow in Smog all over the lid and a little in the crease. Then I put Urban Decay eye shadow in Sidecar in my crease and brought it in wards. For the outer corner I used Urban Decay eyeshadow in Darkhorse and blended it in. For my inner corner high light I used Urban Decay eyeshadow in half baked and lined the inner corner. Then I applied Urban Decay 24/7 liner in zero to my upper lash line and smudged it (The reason I did this is because I wanted it to look soft and not take away to much attention from the eye shadow).  I wanted to open up my eye since some of the colors were dark so I put MAC chromagraphic pencil to my waterline. Then I just curled my lashes, applied lash primer, put sephora lash plumper mascara, and finalized with Rimmel Eye magnifier mascara.


If you have any questions, leave them down below
*All of these products were paid with my money*
*All images are my own*

  • Digg
  • Del.icio.us
  • StumbleUpon
  • Reddit
  • RSS

Holiday Look Eye Of The Day December 8

This is a sparkly holiday look. It is based on beige, bronze, and rich brown colors.


Products Used:
Urban Decay Primer Potion
wetnwild coloricon palette in Night Elf (Limited edition from Holiday Collection 2010) colors used: shimmery middle beige on the left and club dupe on the left which is under the beige
MAC eye shadow in Honey Lust 
NYX eye shadow in deep bronze
Glamour Doll eye shadow in chocoholic 
wetnwild Mega Eyes Créme Eyeliner in Black 
Sephora Lash Plumper 

Face Products:
MAC Prep + Prime Skin
Maybelline Dream Liquid Mousse 
NYX eye shadow base in skin tone 
MAC Studio Finish Concealer
elf High Definition powder
elf Complexion perfection
NYX cream blush in Rose Petal
MAC Mineralized Skinfinish Natural 
Sephora blush me! in Rose Rebelle 
MAC lipstick in Jazzed (In the Groove Collection)
Here is how to achieve this look:
  1. Apply UDPP all over your lid to your brow bone
  2. Pat the shimmery beige all over your lid (I do not advise sweeping the color because there will be a lot of fall out).
  3. Using a round crease brush use MAC honey lust in your crease & drag it inwards to the outer part of your lid (Be careful when using this shade because it has glitters and leaves a lot of fall out too.)
  4. Get the club dupe in the night elf palette and put some in the outer part of the lid and in the outer corner (Make sure to blend)
  5. Getting NYX deep bronze apply it to the outer half of your lid and go over the club dupe 
  6. In order to deepen the brown apply Glamour doll in chocoholic to the outer corner
  7. Apply eye liner 
  8. Curl Lashes and put on mascara
                                           
If you have any questions, leave them down below
*All of these products were paid with my money*
*All images are my own*

  • Digg
  • Del.icio.us
  • StumbleUpon
  • Reddit
  • RSS

Urban Decay Naked Palette Review and Swatches

Recently I just got the Urban Decay naked palette.
Here are swatches:
(Note: The eye shadows were swatched on top of elf's eyelid primer {$1})
This palette includes 12 eye shadows, an eyeliner duo,  and a travel sized primer potion. There are only two matte shades which are Buck & Naked. The other colors are either shimmery, or glittery. The pigmentation on this set is pretty good. There were only two shades  that needed a little more work to show up. They are Buck & Naked (Naked is a muted beige so do not expect it to be very noticeable).  So here are my over all pro's and con's
                                Pros:
                               1. All are full sized eye shadows
                               2. Great Value
                               3. Easy to travel with 
                               4. Versatility
                               5. Good color range 
                               6. Nice eyeliner great for travel 
                               7. Two eyeliners 
                               8. All in one
                               9. Interior is easy to clean

                                Cons:
                                1. Some shades had a little fall out
                                2. No versatility on eye shadow finish 
                                3. Case looks a little flimsy on the inside
                           BUT the biggest con is:
                               4. Hard to find
This is a nice palette for a person who travels, who likes urban decay, or someone who really wants to get the best bang for their buck. My issue is it is so hard to find and is way overhyped. It is permanent so do not buy it on ebay (Unless you really want to, but consider that you are probably going to waste a lot more than if you would have waited). I also hate the fact that only two shades are matte. I do not recommend this for someone who does not like shimmer. I would recommend this to anyone who wants to discover high end products or really likes the shades in the palette. 

Here are two looks I created with the palette:
1. Natural Day Look:
 2. Dramatic Night Look:
What do you think about this palette?

  • Digg
  • Del.icio.us
  • StumbleUpon
  • Reddit
  • RSS
Eveypoison. Powered by Blogger.